That beloved bracelet with the stretched-out elastic and the widening gap between beads? You do not need a jeweler, a craft degree, or special talent to fix it. Restringing a crystal bracelet at home is a twenty-minute job with about five dollars of supplies — and once you learn it, you will never throw away a tired bracelet again. This guide gives you the exact tools, the right elastic, and a step-by-step method that produces a knot that actually holds.
Tools and Materials: The Complete Checklist
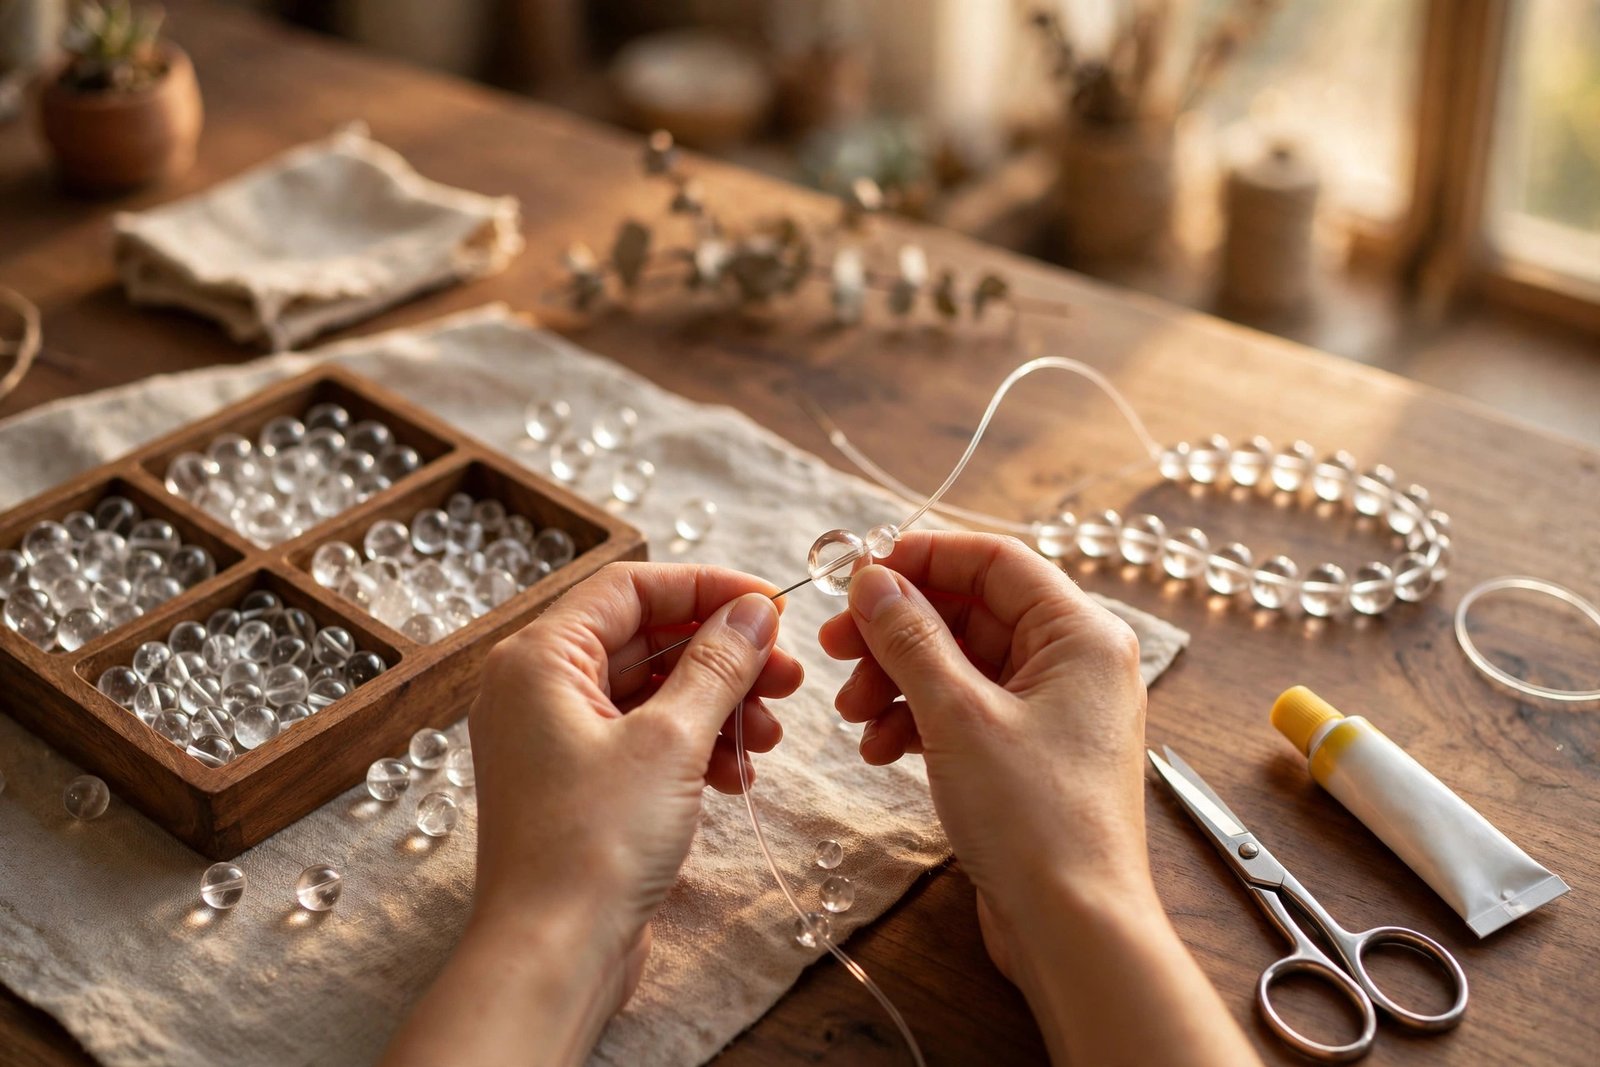
- Stretch elastic cord — 0.8mm for beads under 8mm, 1mm for 8–10mm beads. Clear cord disappears against light stones; black cord suits dark stones like obsidian.
- A beading needle or twisted wire needle — collapsible-eye needles thread easily through small bead holes and fold flat to pull through.
- Small sharp scissors — clean cuts matter; frayed cord ends jam in bead holes.
- Super glue or jewelry cement — a tiny drop secures the knot. Use a precision-tip tube, not a big bottle.
- A bead tray or towel — keeps beads from rolling away. A folded towel works perfectly.
- The original beads — laid out in the order you want them restrung.
Before you buy cord, it is worth checking whether the bracelet is even worth saving. Our elastic bracelet inspection guide shows how to spot cracked beads and worn drill holes that would sabotage a fresh restring.
Choosing the Right Elastic Cord
Cord choice decides how long your repair lasts. The 0.8mm cord threads through almost any bead hole and feels delicate, but it stretches faster under heavy stones. The 1mm cord is noticeably sturdier and the better choice for 8mm+ beads or dense stones like hematite. Avoid the ultra-thin 0.5mm cord for anything you wear daily — it is for lightweight seed beads, not crystal bracelets.
Buy more cord than you think you need: a full meter per bracelet is comfortable. Fresh cord is cheap, and running short mid-stringing is the classic beginner frustration.
The 7-Step Restring Method
Step 1: Measure and cut
Cut a length of cord about 30cm (12 inches) longer than the bracelet’s finished circumference. The extra length gives you room to tie comfortably. If the old bracelet is still in one piece, measure against it; otherwise, measure your wrist and add 2–3cm for comfortable drape. If your wrists run small, our sizing guide for small wrists helps you nail the measurement first.
Step 2: Pre-stretch the cord
Hold the cord between your hands and stretch it firmly five or six times. Fresh elastic has factory tension that relaxes in the first days of wear — pre-stretching now means your bracelet will not go slack next week.
Step 3: Thread the needle and string the beads
Thread the needle, then string your beads in your planned order. If you photographed the original layout, follow it; otherwise, this is your chance to improve the design — perhaps graduating bead sizes or adding a new accent. Keep the layout on your tray exactly as strung until you are done.
Step 4: Position the knot inside a bead
When all beads are on, bring both cord ends together. The pro trick: plan for the knot to hide inside one bead’s drill hole. Slide the beads so the knot location falls inside a larger bead, where it will be invisible and protected.
Step 5: Tie a surgeon’s knot
Tie an overhand knot, then pass the end through a second time before tightening — this is a surgeon’s knot, the standard for elastic bracelet making because the double wrap grips the slippery cord. Pull firmly, then tie a second surgeon’s knot on top. Two knots, both pulled tight, is the minimum for a bracelet you will actually wear.
Step 6: Glue and trim
Place one tiny drop of super glue on the knot — not on the beads. Let it set for two full minutes. Then trim the cord ends close to the knot, leaving about 2–3mm. Tug gently to settle the knot inside its hiding bead.
Step 7: Rest and test
Let the bracelet rest for at least an hour before wearing (overnight is better) so the glue fully cures. Then stretch it gently a few times over your hand. If the knot holds and the drape feels right, you are done.
Common Mistakes That Cause Re-Breaks
- Skipping the pre-stretch — the bracelet goes baggy within days.
- One knot only — elastic is slippery; a single overhand knot will walk loose.
- Glue on the beads — it clouds the polish and can never be fully removed. Glue touches the knot only.
- Reusing tired beads with sharp holes — one rough drill hole will saw through your new cord in months. Feel each hole with the cord tip; discard or smooth any bead that snags.
When Not to DIY
Restring at home for standard elastic bead bracelets. Hand it to a professional if the bracelet has wire stringing, crimp beads, a clasp mechanism, or valuable stones where a mistake is costly. Curious how the two stringing styles compare? Our elastic vs wire durability comparison breaks down which lasts longer. And if the bracelet broke suddenly and scattered everywhere, check every bead for chips before restringing — a cracked bead is a future break waiting to happen.
A freshly restrung bracelet is also the perfect moment to rethink your collection. If you are experimenting with how many bracelets to wear at once, a repaired favorite makes a wonderful stack anchor, and our tumbled vs raw comparison can inspire your next addition. For a clean, versatile bead that restrings beautifully, the clear quartz bracelet is a workshop favorite.
“The knot is the whole bracelet. Beads are beautiful, but a bracelet lives or dies on twenty centimeters of cord and the care you put into tying it.”
Find more hands-on care skills in our crystal bracelet guides.
Frequently Asked Questions
How long does a restrung crystal bracelet last?
With fresh 1mm elastic, a proper surgeon’s knot, and normal daily wear, expect 12–18 months before the cord needs attention again. Heavy stones, perfume exposure, and constant stretching shorten that; rest days between wears lengthen it.
What is the best cord for restringing crystal bracelets?
Stretch elastic cord in 0.8mm for beads under 8mm and 1mm for larger or heavier beads. Look for cord specifically sold for jewelry making rather than sewing elastic — it is formulated to resist UV and body oils longer.
Can I restring a bracelet without a beading needle?
You can stiffen the cord tip with a dab of super glue or clear nail polish to thread small holes, but a collapsible-eye beading needle costs very little and makes the job dramatically easier. For beads under 6mm, a needle is practically essential.
My knot keeps coming undone. What am I doing wrong?
Almost always one of three things: you tied a single overhand knot instead of a surgeon’s knot, you did not pre-stretch the cord so it relaxed and loosened the knot, or you skipped the glue. Fix all three and the knot will hold.









 English
 Vietnamese